I’ve been using a premium DNS provider since 2014 and only recently switched to use vanity nameservers. This will be a walk through showing the steps I took to setup vanity nameservers using Constellix (DNS Provider) and Hover (Domain Provider) for anchor.host.
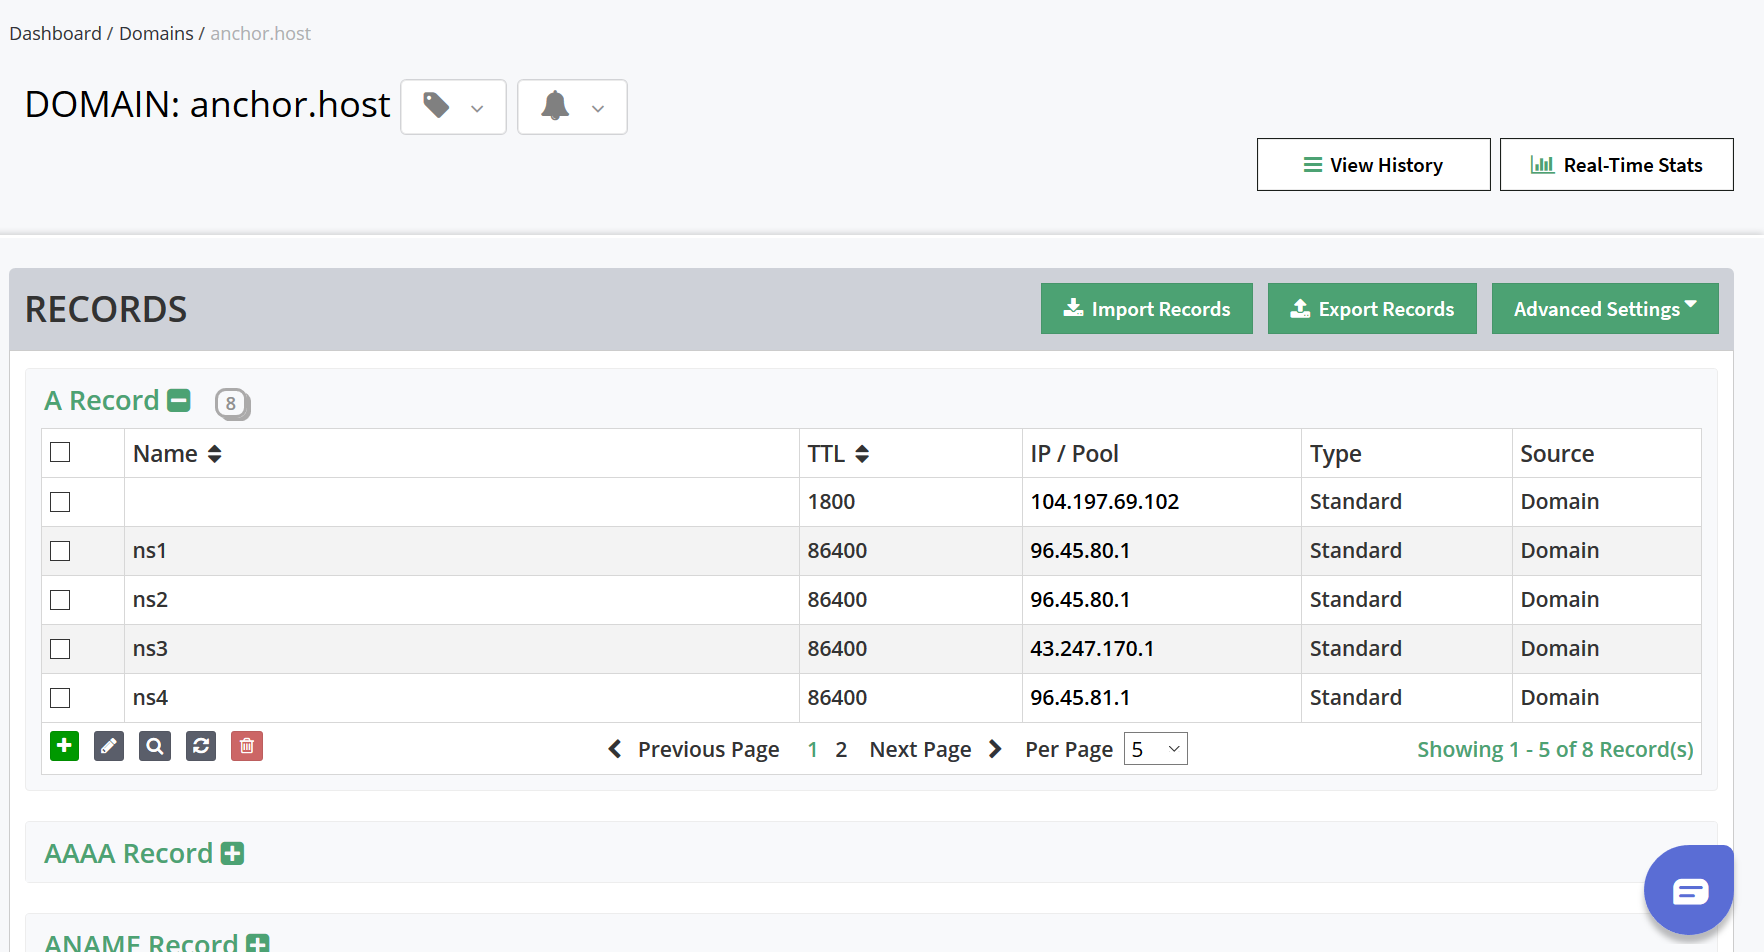
Step 1: Add new A records to primary domain.
First find the IP information for the nameservers assigned to your domain. With Constellix that can be found by selecting your domain, then “Advanced Settings” and then “Nameserver Settings”.
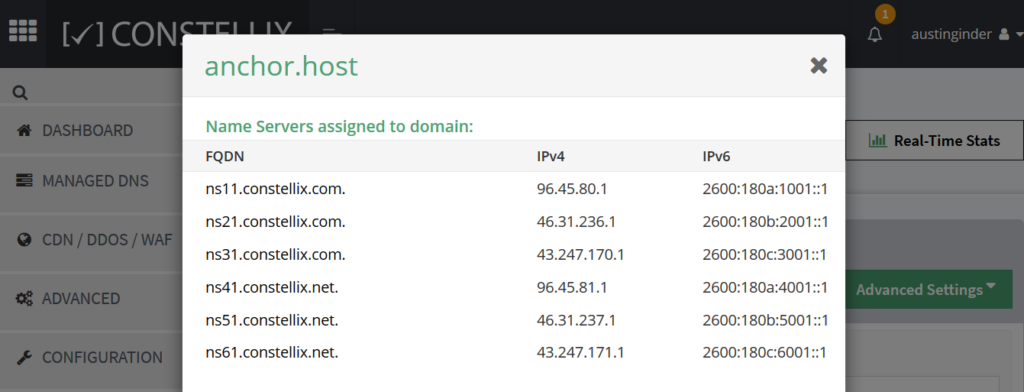
Vanity nameservers are added as regular A records, however they should have a really long TTL of 86400 or 1 day. The vanity nameservers need to match the DNS provider. Constellix provides 6 nameservers, however it’s not required that you use them all. For my setup I decided to add A records for ns1.anchor.host, ns2.anchor.host, ns3.anchor.host and ns4.anchor.host.
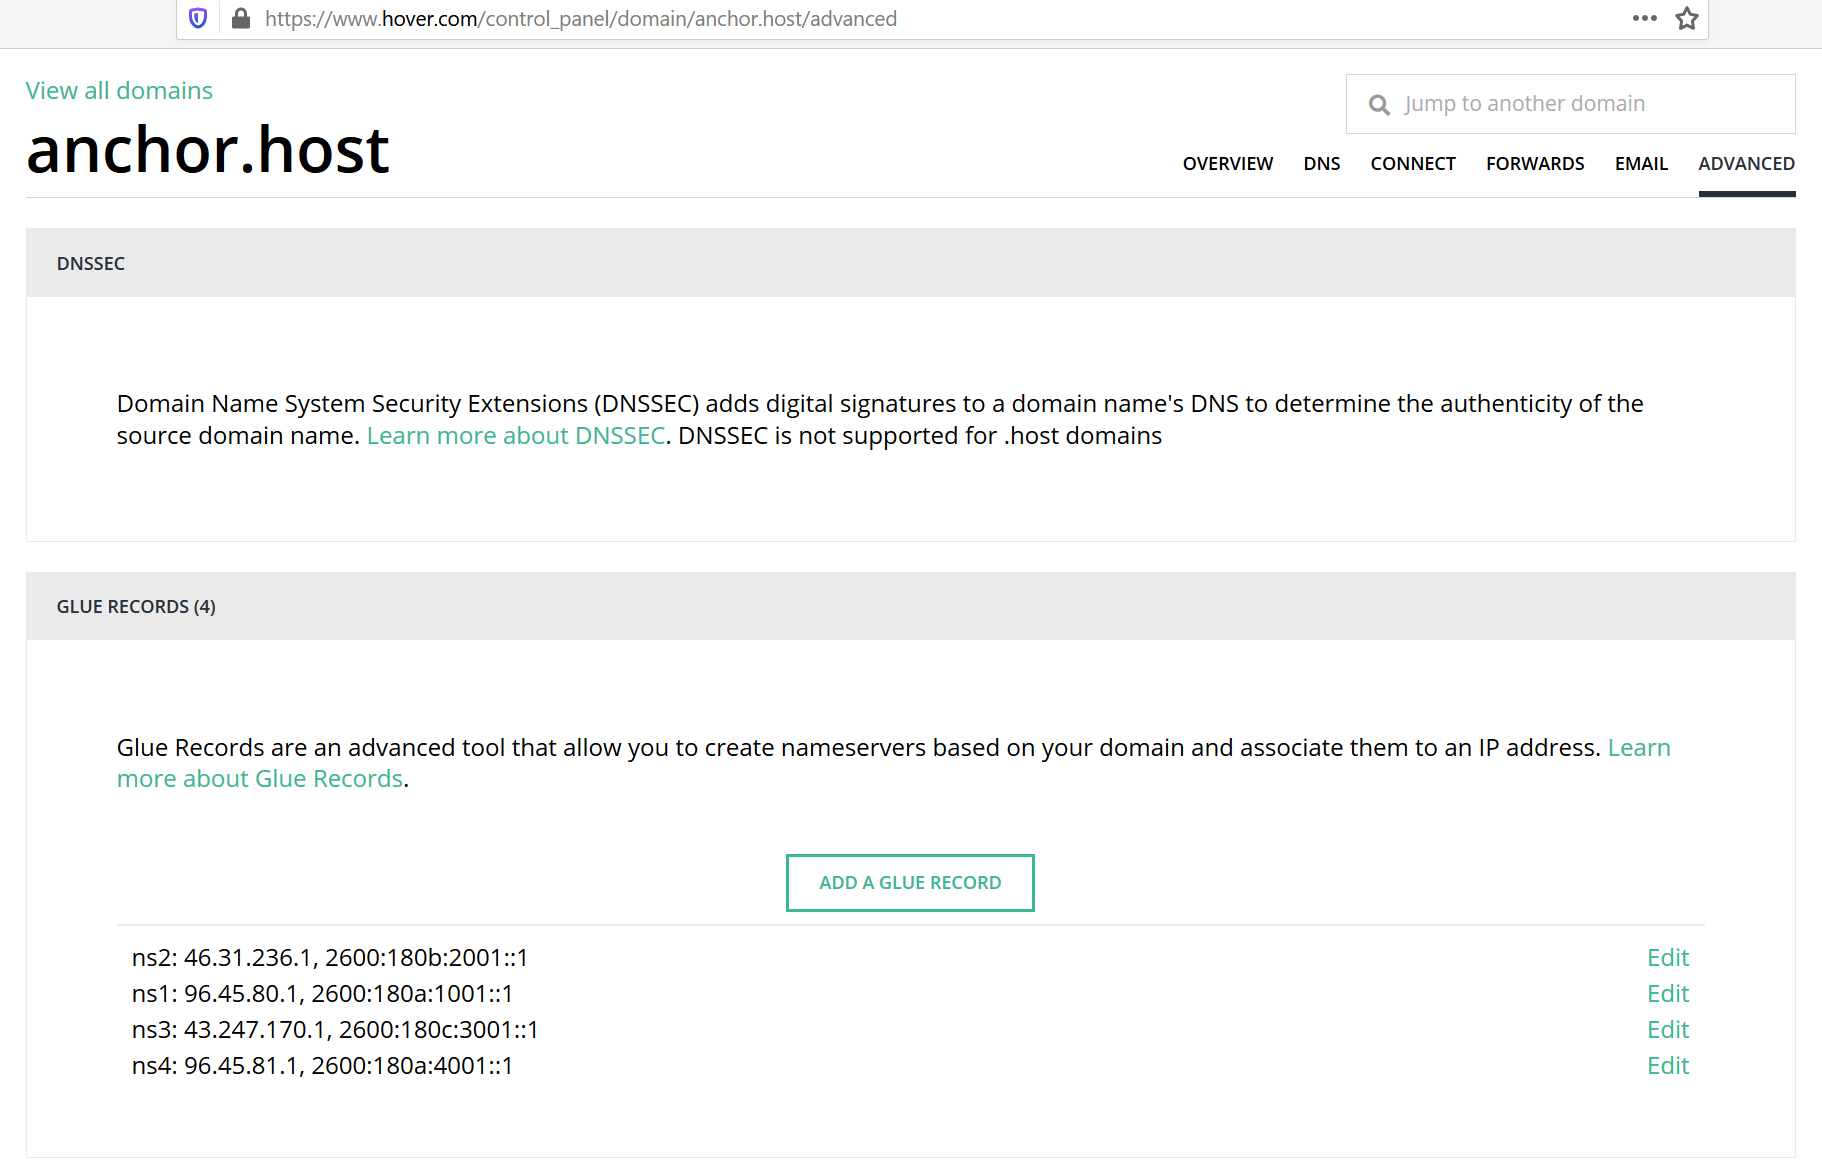
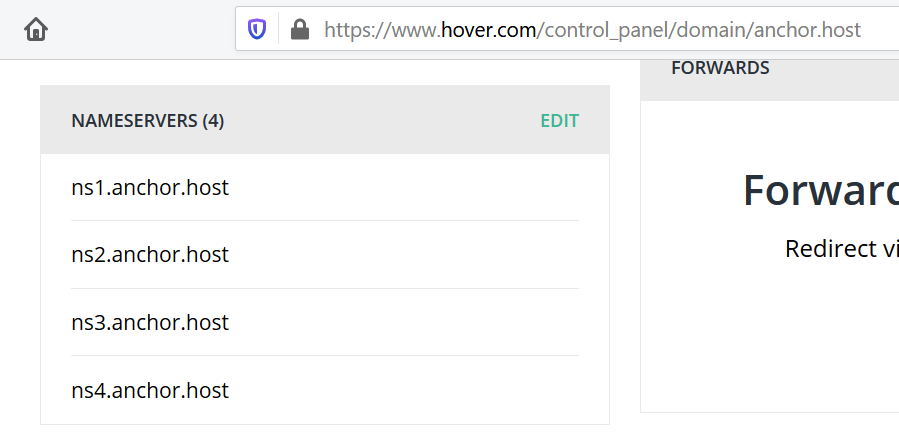
Step 2: Add glue records to domain provider then update nameserver.
You won’t be able to use these new nameservers until you add glue records. If you try you’ll see an error Nameserver [ns1.anchor.host] doesn't exist at the registry (Code 480). With Hover you select the domain then go the advanced tab. Here add the same records as glue records using the information provided by Constellix.
With the glue records in place you can now switch from the default Constellix nameservers to the new vanity nameservers.
Step 3: Create vanity nameserver group with Constellix and apply.
In Constellix select Advanced then Add Vanity Nameserver. Simply list out the new nameservers and click save. This will be used to quickly apply them to each domain.

Step 4: Apply vanity namservers to domains via Constellix and domain registrar.
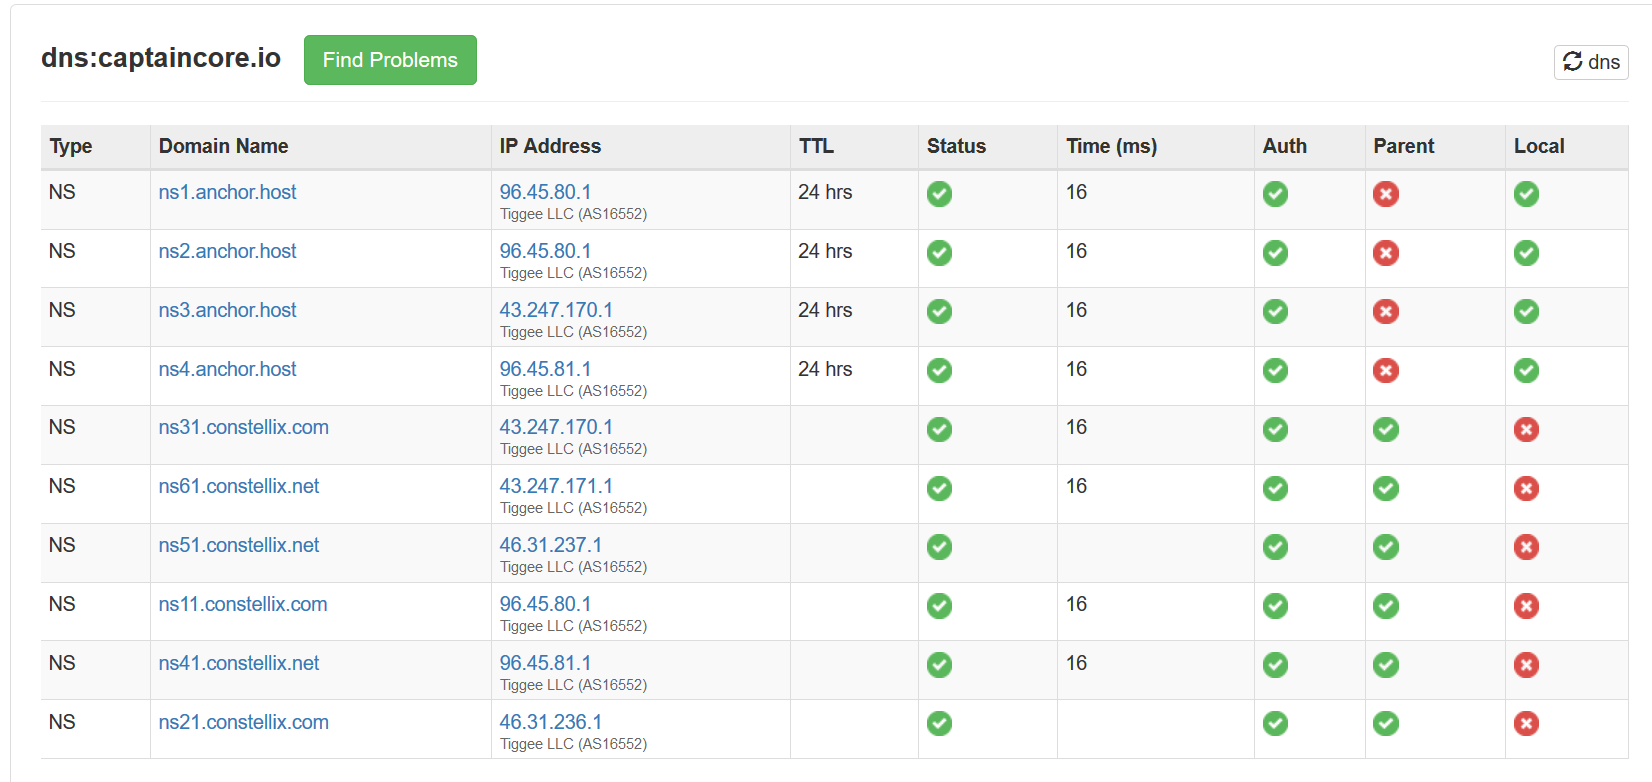
These new nameservers still need to be applied to the domain within Constellix, including the main domain. If both aren’t updated at the same time, technically everything will continue working, however you’ll see odd looking warnings from MX Toolbox.
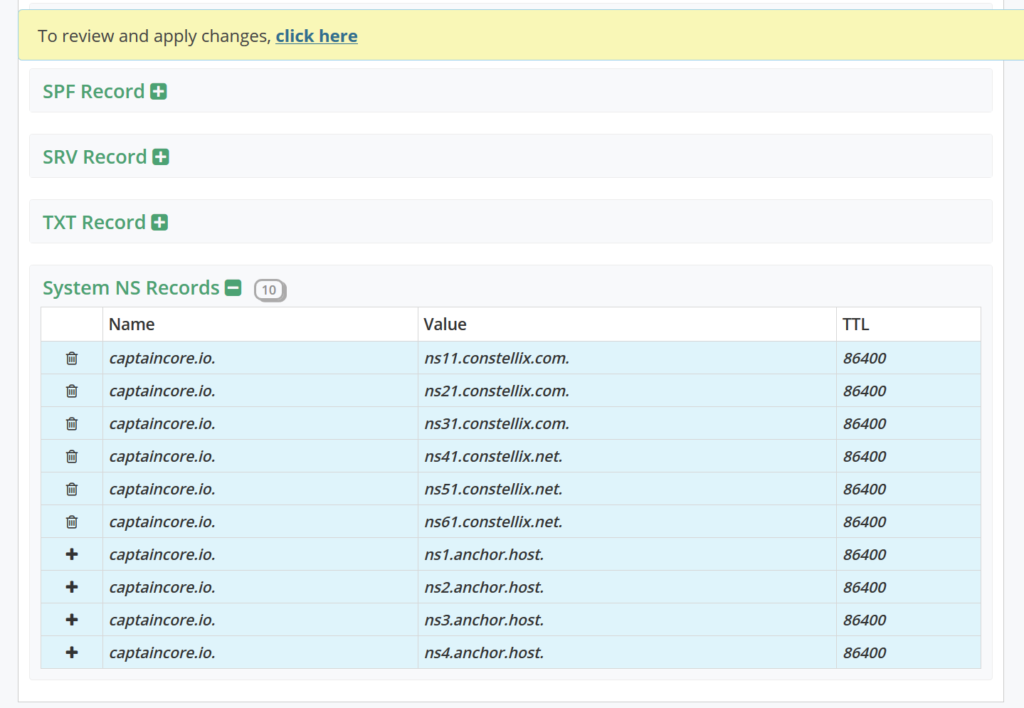
In Constellix select one domain or more domains, then Advanced Settings and Apply Vanity Nameservers. Select the group created above then apply.
Now MX Toolbox will show everything is healthy.
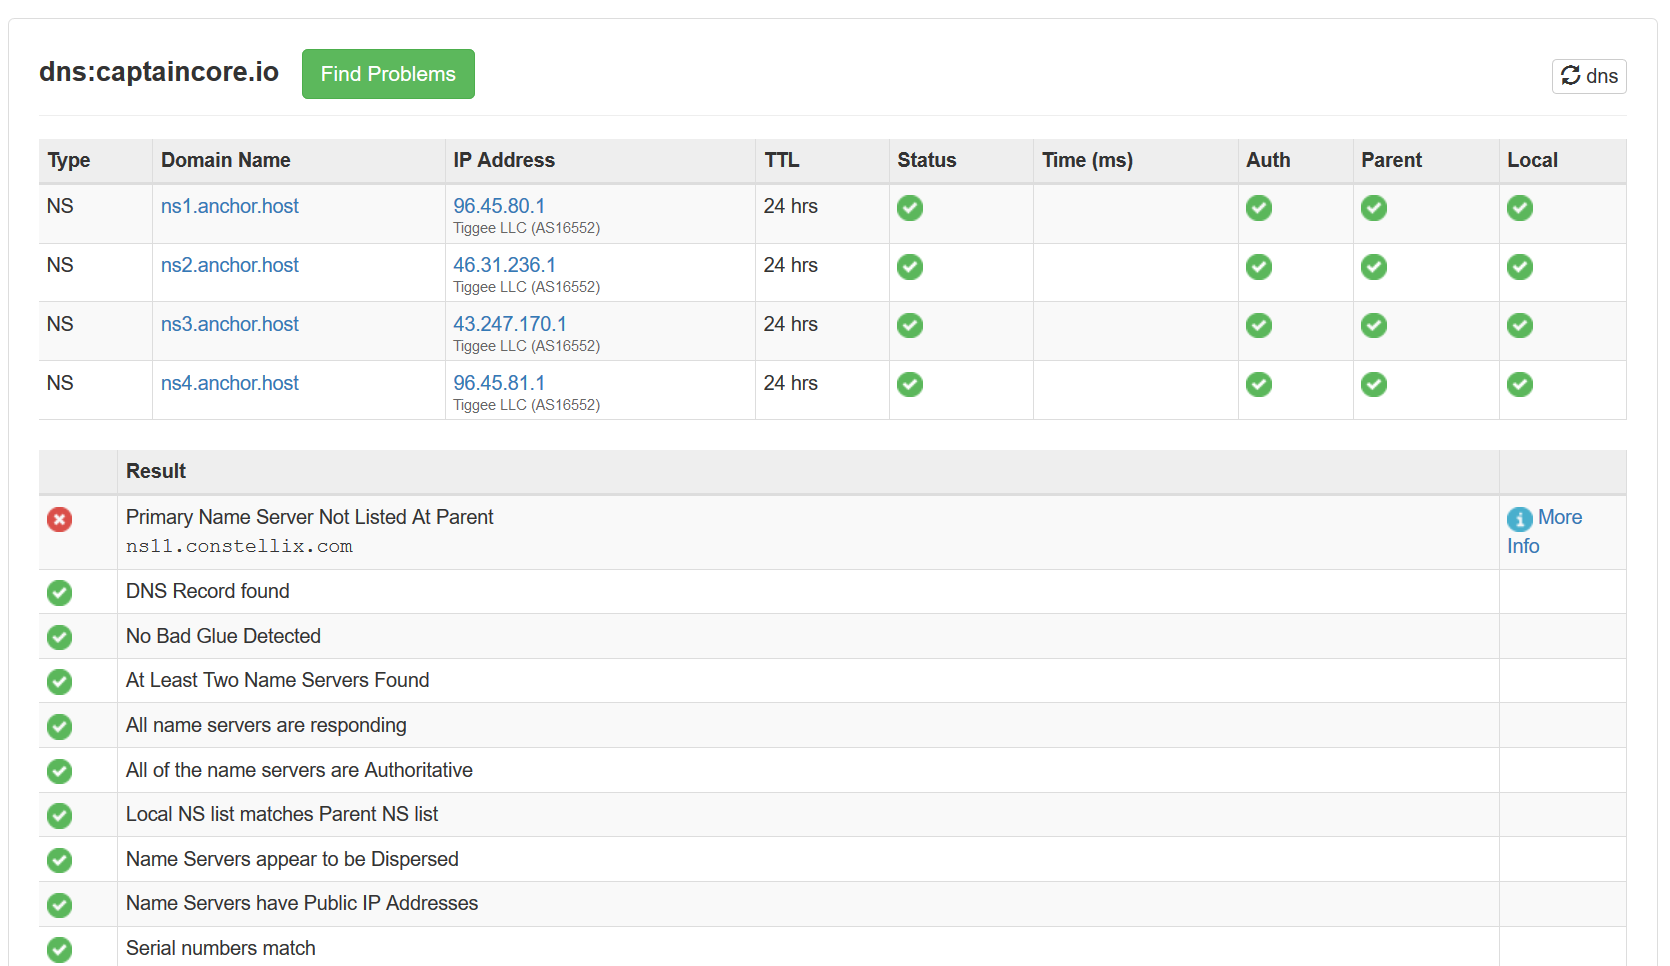
Now repeat this step for every domain using the default nameservers and success! That’s it.
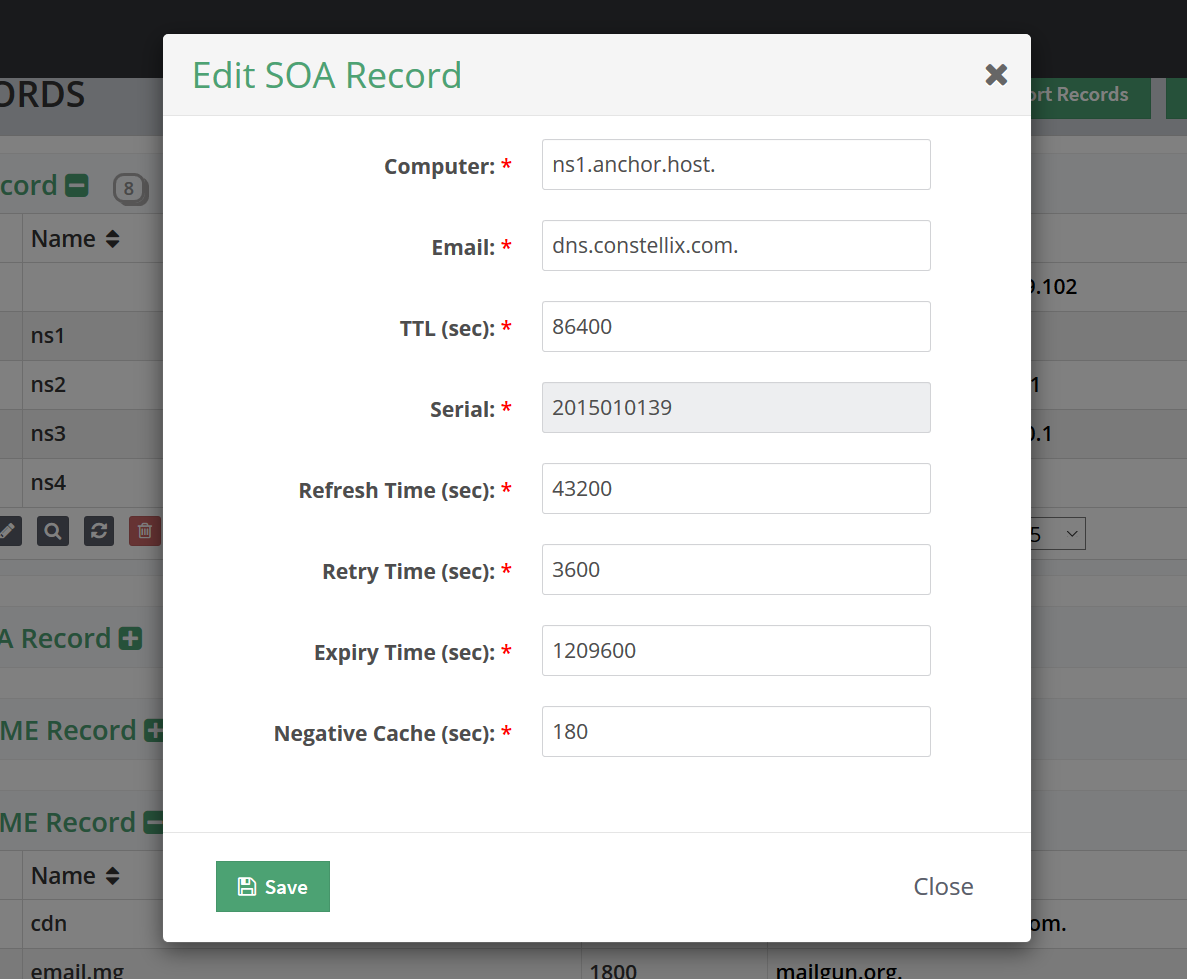
Optional update SOA to match custom nameserver.
This last part is completely optional. It won’t affect anything health wise however it will take care of the last red flag listed in MX Toolbox Primary Name Server Not Listed At Parent. In Constellix select each domain then go to Advanced Settings then Modify SOA Record. Change the Computer name to match one of the new nameservers.