WordPress websites need to managed by someone who can keep after things 24/7 if you wish sleep well at night. That’s why for hosting WordPress websites I rely on managed WordPress hosts like Kinsta. Kinsta has the staff and sysadmins to do just that. If something goes offline in the middle of the night, they do a fantastic job handling the issue.
That said, not everything requires that level of oversight. My management toolkit, CaptainCore, falls within this category. It’s important but doesn’t need managed hosting and a perfect opportunity to explore self-hosted options. I previously hosted CaptainCore with Digital Ocean and recently moved it to Google Cloud. This was my first experience running on Google Cloud. Here are a few things I learned along the way.
Google Cloud pairs nicely with Kinsta.
Each night my CaptainCore instance makes a nightly incremental backup of all of my WordPress sites. While this is already an efficient process, moving to Google Cloud means that CaptainCore is now physically closer to many of my WordPress websites. This is due to the fact that Kinsta also uses Google Cloud for their own infrastructure. Close proximity also means bandwidth fees are reduced and sometimes free in cases where both servers are within the same Google datacenter and zone.
Create a new VM instance.
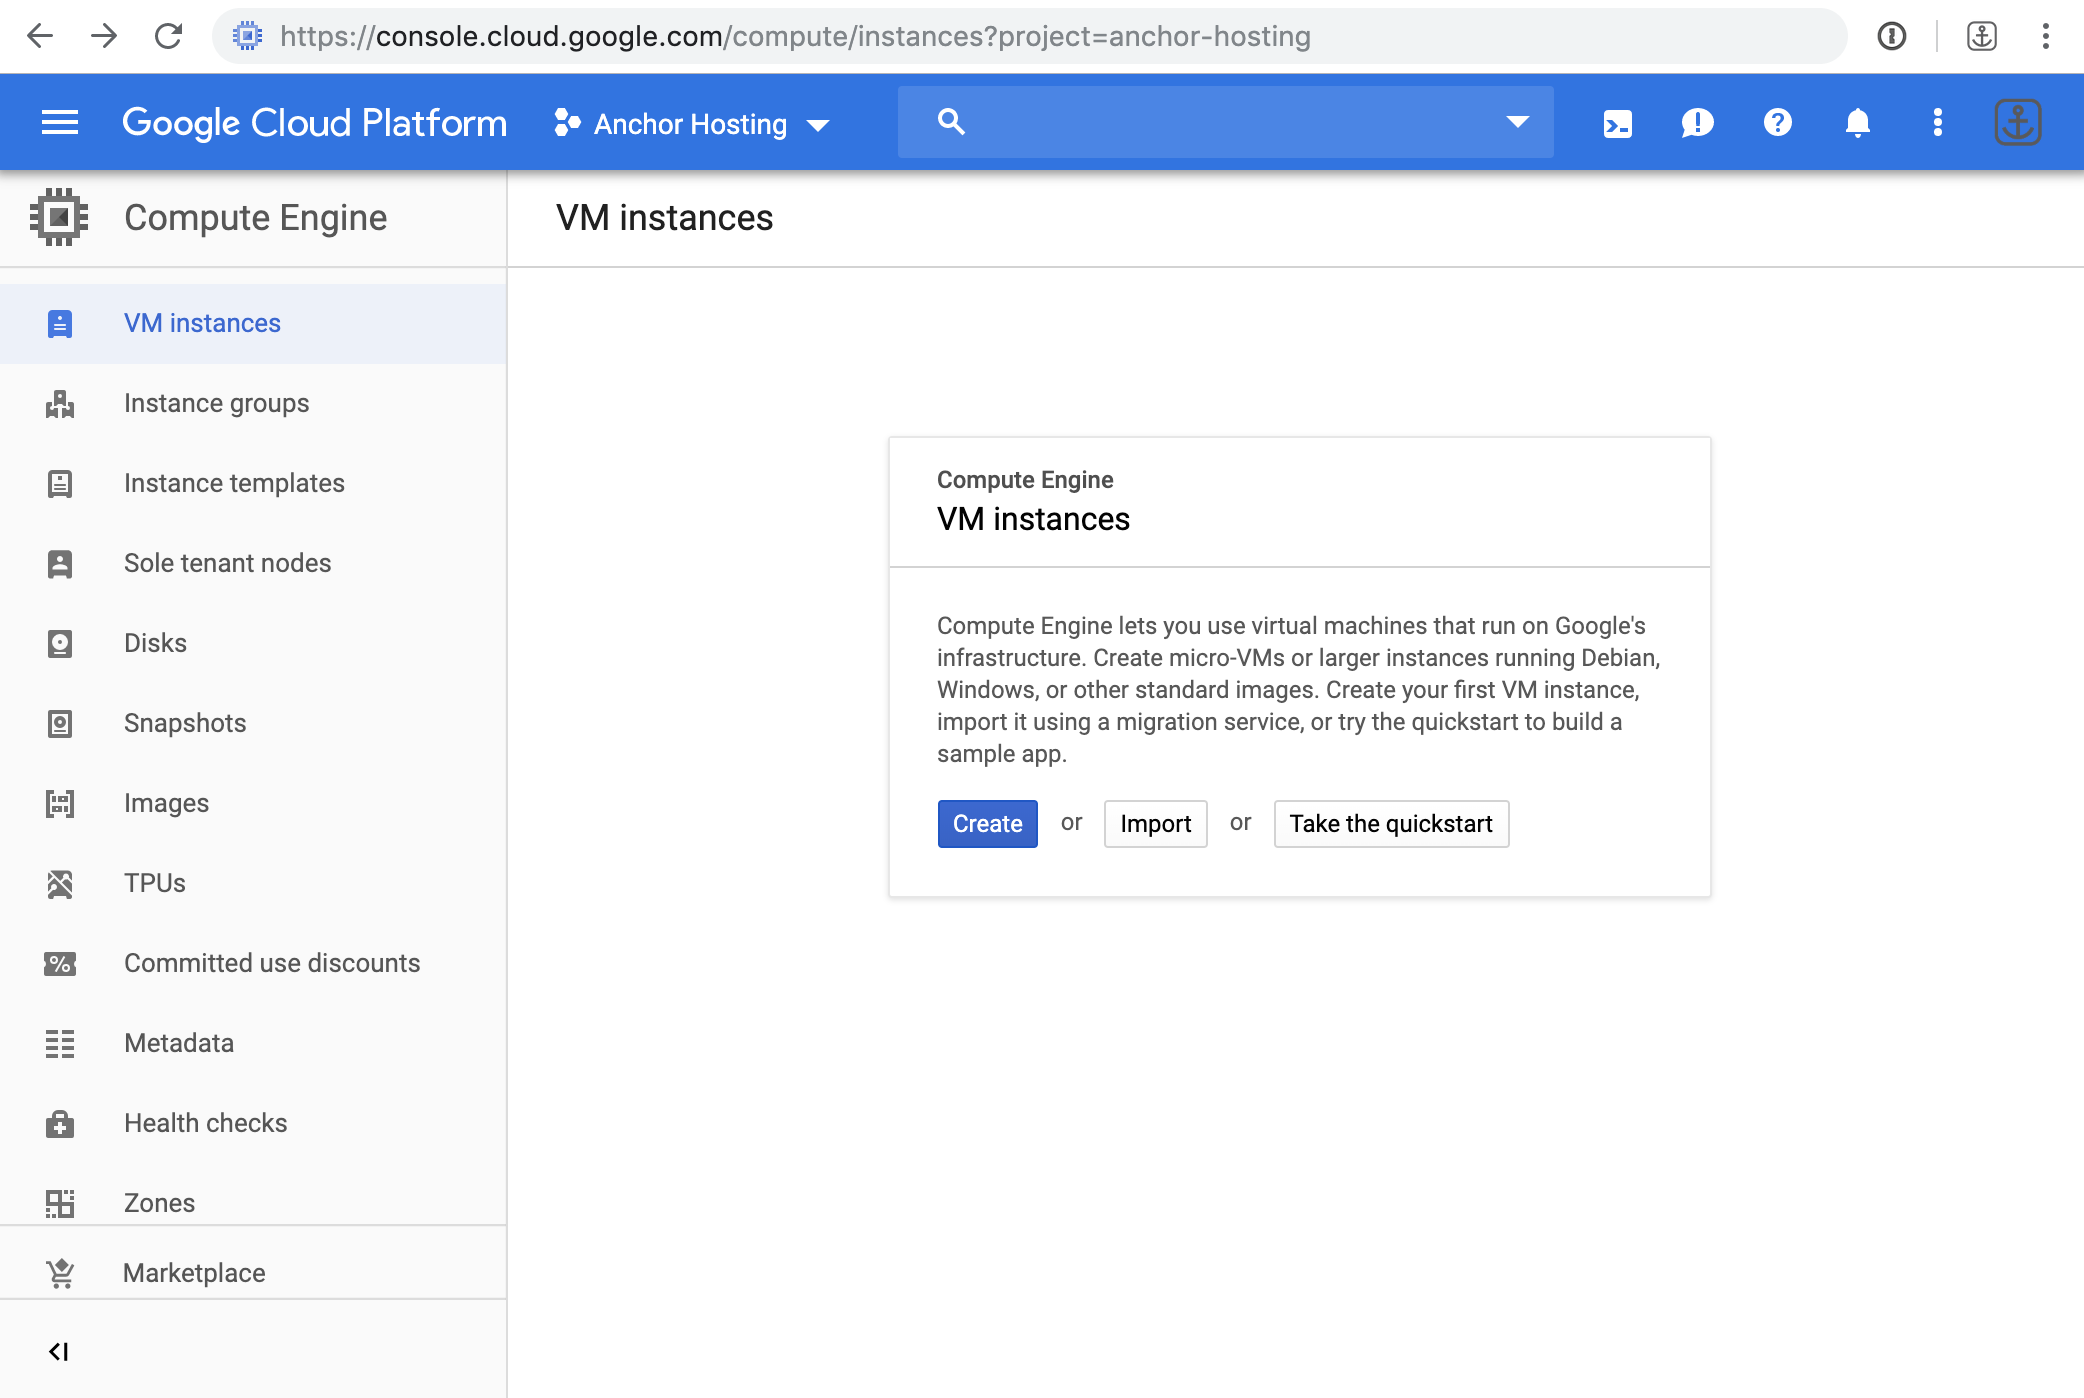
Google Cloud isn’t quite as easy to use as Digital Ocean however it is significantly easier than Amazon. To get a new VM instance up and running follow these steps.
- Within Google Console create a new project and link a billing account.
- Then select Compute Engine > VM Instances
By default the operating system isn’t on an SSD drive so you’ll definitely want to upgrade that. You can optionally pick additional storage disks to add. The slower the storage the cheaper the usage rate will be. Here is quick overview video walking through the getting started.
Rename the default admin account.
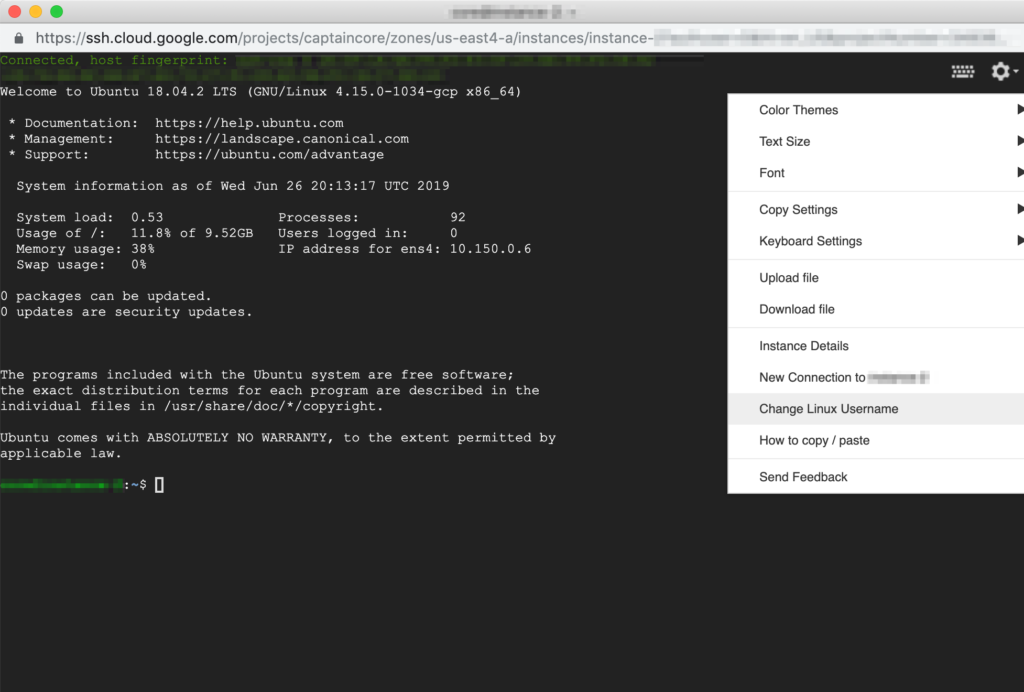
Google has a built-in way of connecting to VMs using their web based SSH. The first thing I recommend is to rename their default user to something custom. That can be done from the gear icon in the top right of the SSH GUI.
Generating new SSH keys per new user.
Connecting with the default SSH GUI is a little sluggish as Google dynamically generates new SSH keys each time and transfers them to the VM. In order to connect directly from the command line you’ll first need to generate a new SSH pair and import into the instance via Google Cloud instance. There are a few ways to accomplish that however these are the steps I took.
- Connect via Google’s web based SSH and generate a new key pair using
ssh-keygen -t rsa. This insures the new key pair matches the new username on the new instance. Google is smart and binds imported keys to a specific username. - Copy the new keys under
~/.sshto the your local computer - Within Google Console select Compute Engine > VM Instances > Pick your instance.
- Select Edit > SSH Keys > Select Show and edit > Paste contents of the public key pair here and save.
Now from your local computer you can connect to the Google Cloud instance using the format of ssh -i ~/.ssh/id_rsa_{key_name} username@{google_public_ip_address}.
Use defaults storage formatting options for ease of use later on.
For additional storage you most likely will want to attached persistence storage. That needs formatted and mounted before it’s useable. I recommend following Google’s default formatting steps here: https://cloud.google.com/compute/docs/disks/add-persistent-disk#formatting. With the default formatting, Google can do a bit of magic and automatically manage disk resizing.
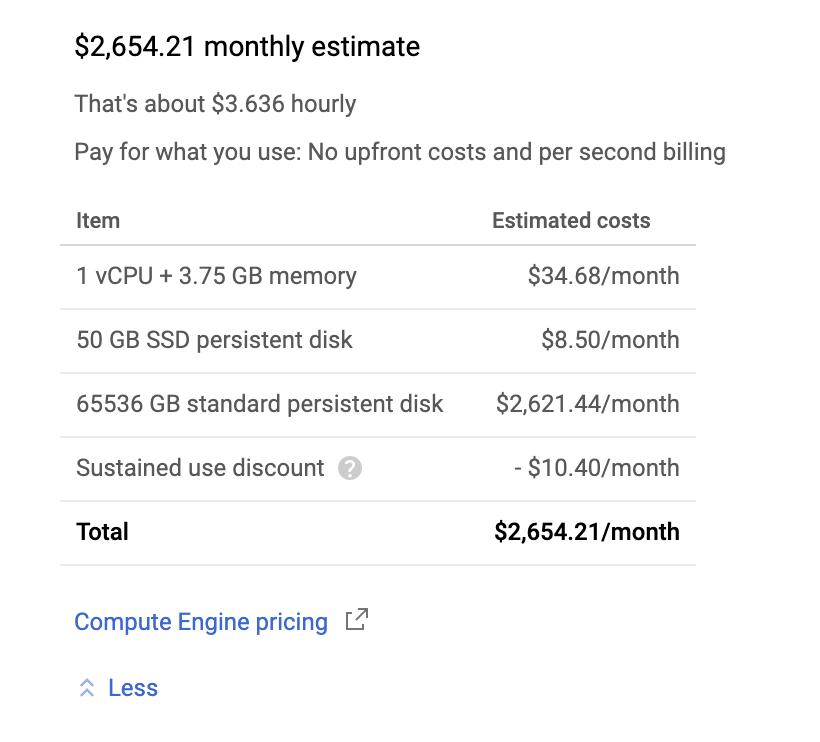
Google’s storage scaling options are amazing. With a few clicks of a button you can easily increase a 100GB disk to 64TBs assuming you accept the high cost (see estimate below). See breakdown of Google storage limits here: https://cloud.google.com/compute/docs/disks/. An interesting side of affect of increased storage is faster read/write.