
When I switched my daily driver to Linux, one missing piece was how to handle local backups. I previously relied on Backblaze, which is an awesome application that provides real-time backups, Unfortunately Linux isn’t supported. After trying out various backup solutions I settled on using a command-line solution restic with a B2 bucket. It’s a very efficient and elegant backup solution.
While this will be a guide for personal use, many of the ideas here are what power the website backups for Anchor Hosting customers. If you are curious about how that works check out this article.
Preparing Restic and Rclone
Restic is a cross-platform backup application written in Go. Even though I’ll be explaining how this is accomplished on Linux, specifically Pop!_OS, it should be possible to do on any platform. The first step is to install and update Restic to the latest version.
sudo apt install restic
sudo restic self-update
restic version
If all goes well you should be running the latest version. Restic natively supports a bunch of storage backends however they also support any Rclone backend. That means you can store your Restic backup pretty much anywhere you’d like. I store my backup on a B2 Bucket via Rclone. So let’s make sure Rclone is installed and up to date.
curl https://rclone.org/install.sh | sudo bash
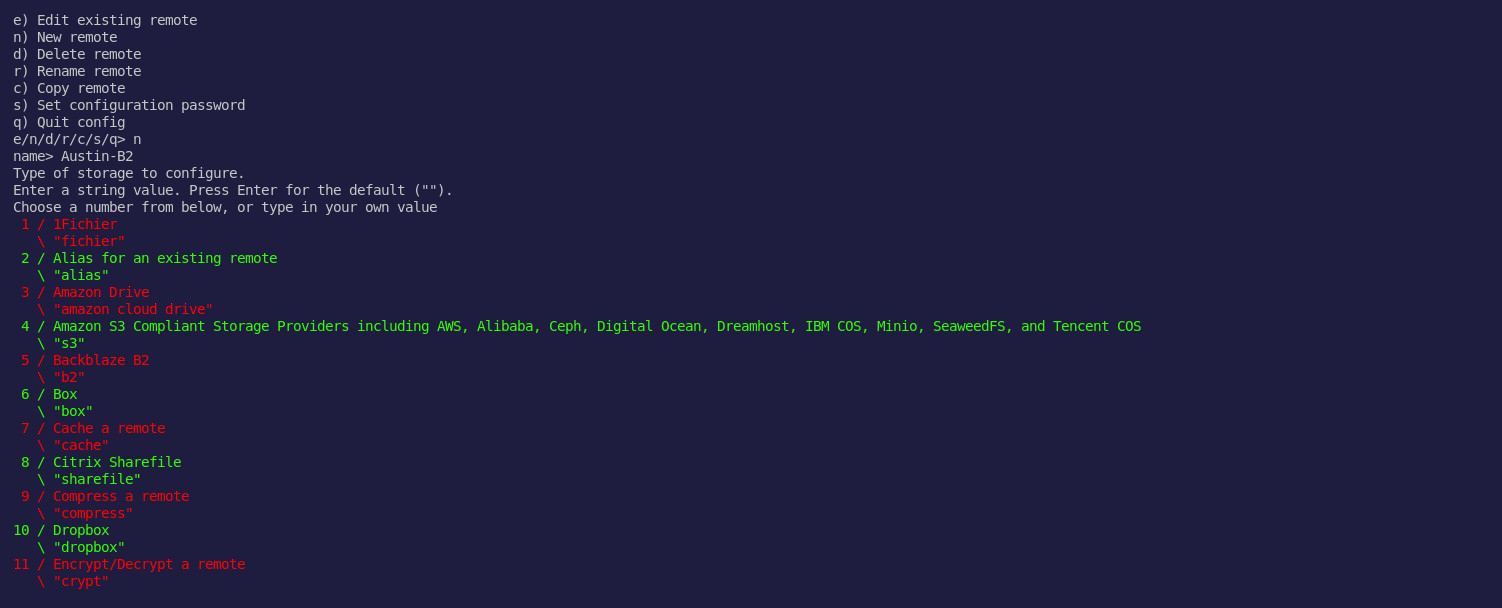
rclone versionNext, add Rclone to the backend. This can be done by running rclone config and walking through the sequence of questions. At this point, you’ll need to plug in credentials from your B2 bucket or whichever cloud provider you’re using. Rclone requires you to name the backend which you’ll need when setting up Restic. I’ve named my new Rclone backend Austin-B2 as shown here.
Creating the initial Restic backup repo
There are some one-time commands necessary to start a Restic backup repo. The first step is to generate a Restic password which will be used to encrypt the data in the backup repo. This is a required step in order to use Restic. Seeing as we’ll be storing data on a cloud provider, it’s good to know everything will be private. We can add the following to our bash startup file. I’m using ZSH so I’ve added the following at the end of my ~/.zshrc file. If you’re running default bash then you’ll add it to ~/.bashrc. Be sure to close your terminal and relaunch.
export RESTIC_PASSWORD=MY_RANDOM_KEY_HERE_PLEASE_CHANGE_MEYou can store the backup repo anywhere you’d like, just make sure it’s an empty folder. With B2 the first folder is the bucket name. So the following command will place the Restic backup repo on B2 under the Backup bucket in a folder called timemachine.
restic -r rclone:Austin-B2:Backup/timemachine initExcluding unnecessary files
While backing up everything seems like the thing to do, there is often lots of data changing that you might not want to include in your backups. With Restic you can create an excludes file. Create a new file called restic-excludes.txt and include any file or path you don’t want to include. Feel free to use my excludes file as a starting point.
Caddy/**/logs/
Caddy/**/node_modules/.pnpm/
Downloads/
Documents/CaptainCore/Captains/**/**/**/backup/
Documents/CaptainCore/Captains/**/**/**/backups/
Documents/CaptainCore/Captains/**/**/**/restores/
Documents/CaptainCore/Captains/**/**/**/quicksave/
DevKinsta/logs/
.var/
.npm/
.BitwigStudio/cache/
.cache/
.config/Local/
.config/discord/
.config/Hyper/GPUCache/
.config/Slack/
.config/chromium/
.config/1Password/
.config/Code/
.config/Beaker Browser/Cache/
.config/Beaker Browser/Service Worker/CacheStorage/
.config/google-chrome/Default/Service Worker/CacheStorage/
.config/Simplenote/IndexedDB/
.config/Hyper/Cache/
.config/microsoft-edge-dev/
.config/microsoft-edge-beta/
.config/microsoft-edge/
.local/
.pnpm-store/
.mozilla/
.thunderbird/
.wp-cli/
Seafile/.seafile-data
Hyperdrive/
Local Sites/**/app/public/wp-admin/
Local Sites/**/app/public/wp-includes/
Tmp/
VirtualBox VMs/%
The backup script
Create restic-backup.sh with the following stored under ~/Scripts/. Obviously, you need to change the bucket, folder, and path to the restic-excludes.txt file to match your setup. Then run chmod +x restic-backup.sh to give it execute permissions.
cd ~/
restic -r rclone:Austin-B2:Backup/timemachine backup . --exclude-file=/home/austin/Scripts/restic-excludes.txt
restic -r rclone:Austin-B2:Backup/timemachine prune
The first backup will run a full backup, so it will take some time as everything is uploaded.
~/Scripts/restic-backup.shFuture backups will be very quick as it will only add changes to the backup repo.
Optionally schedule the backup
I’m personally on a Laptop so I just run the backups manually as needed. That’s typically one per day however if I’m doing some important development work I may run the backup a few extra times throughout the day. If you’re on a desktop that is always on, it might make sense to set up a daily cron job to run the backup. That can be done by running crontab -e then adding the following to the bottom of your crontab file.
30 09 * * * /home/austin/Scripts/restic-backup.shThis will run each day at 9:30am. Refer to https://crontab.guru for scheduling options.
Everything is fully restorable
The brilliant thing about Restic is that everything is fully restorable. Since Restic de-duplicates the data as it’s flowing in, the total size of the Restic backup repo grows very slowly. These snapshots are browsable like any local directory. In fact, the entire Restic backup repo is mountable. First create an empty local directory, like ~/Tmp/timemachine then instruct Restic to mount the repo to that location.
mkdir -p ~/Tmp/timemachine
restic -r rclone:Austin-B2:Backup/timemachine mount ~/Tmp/timemachine
Files or folders can be copied from any of the snapshots just as if you were copying from an external drive. In fact, you can even preview images and open up files directly. That’s amazing for situations where you just need 1 file or even a previous version of a file.
Always save your Restic key and cloud provider credentials somewhere safe. You can only access your backups if you have your Restic encryption key RESTIC_PASSWORD and access keys to your cloud provider. So if your computer fails and you lose everything then you’ll at minimal need these 2 items. I store a copy of RESTIC_PASSWORD and my B2 credentials within 1Password. I’d highly recommend doing the same with your preferred password management system.
So there you have it. A quick walkthrough using Restic. Your own personal time machine backup is stored on any cloud storage provider, fully encrypted and de-duplicated. The ultimate in personal backups.