Here at Anchor Hosting, I run incremental nightly backups for all customers, which are then stored on a B2 bucket. Incremental backups are lightweight and very cost effective. These backups are made in addition to what my host provider, Kinsta, maintains. Kinsta keeps nightly backup snapshots going back 30 days. As such, I’ve rarely ever used my own backups. They’re just meant as a fail-safe backup in case something really bad happens at Kinsta.
My B2 buckets are configured with unlimited file revisions. Even though my backups are just incremental, I could, in theory, fully restore any of my customer’s websites to any day going back potentially years, not just days or weeks. I say in theory as there isn’t a good way to fully reconstruct the files from a B2 Bucket for a given date.
Incremental only file backups have no way to verify restoration integrity.
Even if there was a specific way on B2 for handling a Time Machine-style restore, it could still result with mixed file versions. Imagine restoring to a timestamp where a WordPress plugin was split halfway between two different version updates. Restoring that could have very unintended consequences. For a clean restoration, we’ll either need to track more information upfront or implement a different archival strategy like Restic.
Rclone and Restic packs a pretty amazing backup solution.
Rclone can efficiently sync files between virtually any cloud provider, and is what I use to perform my incremental backups. Restic allows you to incrementally send data to a backup repository. This is very different than Rclone, as Rclone syncs individual files. Restic stores unique data blocks. Restic is ideal for long-term storage as data flowing into the backup repository is de-duplicated and encrypted. That means you can make multiple backups of an entire WordPress site using very little storage overhead with full restoration capabilities.
If Restic is so amazing, you might be wondering why you need Rclone. Well, Rclone is still a great way to sync an entire WordPress site via SFTP to an offsite location. This puts very little load on web server. Just like I wouldn’t want to waste time and server resources generating a backup snapshot, I also prefer to not run Restic directly on the web server. Instead that work can be offloaded locally or even an another server.
Restic repositories are very efficient and can be stored in the cloud.
They don’t even need to have a local Restic repository. Only the data you want to backup needs to be locally accessible. Let’s take a look at a fully working example showing how this might work to backup a Kinsta site locally with Rclone, then push to a Restic repository.
Steps for backing up a WordPress site locally then storing in a Restic repo.
For the sake of this walkthrough let’s assume you’re running these commands on your local computer. Obviously this isn’t a requirement. You can do that same thing using a cheap VPS.
- Install Rclone and connect your WordPresss site via SFTP by running
rclone config. Walkthrough the prompts. - Connect a new B2 Bucket to Rclone by running
rclone config. Walkthrough the prompts. - Install Restic and make a new repo stored on the new Rclone B2 bucket by running
restic init --repo rclone:B2-account:Bucket/sitename/. This can be stored anywhere on the B2 bucket, just make sure it’s saved to an empty directory. Before creating a new repo I recommend you specify a RESTIC_PASSWORD for encryption purposes. That can be handled by addingexport RESTIC_PASSWORD=please-change-meto your bash startup file. ZSH users place this at the bottom of~/.zshrcthen relaunch your terminal. - Backup the WordPress site locally by running
rclone sync sftp-sitename:public/ ~/Documents/Backups/sitename/ --progress. - Send the backup files to the new Restic repo
restic --repo rclone:B2-account:Bucket/sitename/ backup ~/Documents/Backups/sitename/. - Schedule and repeat as often as you’d like.
I’d recommend creating a backup.sh file as shown below and stored under ~/Scripts/. Make sure to grant this script with execute permissions by running chmod +x ~/Scripts/backup.sh
rclone sync sftp-sitename:public/ ~/Documents/Backups/sitename/ --progress
restic --repo rclone:B2-Bucketname:Backup/sitename/ backup ~/Documents/Backups/sitename/
For scheduling, add this to the local crontab. Run crontab -e then add this to the bottom 05 00 * * * ~/Scripts/backup.sh which will run every morning at 12:05am.
Restoring from a Restic repo on B2.
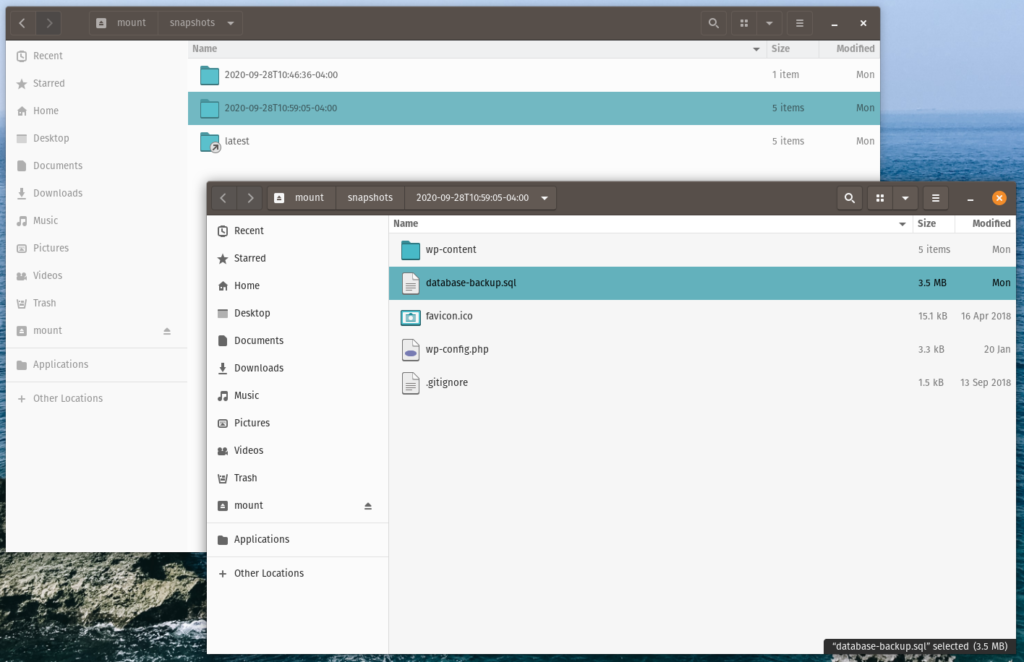
Similar to Rclone’s mount, Restic allows you to mount a Restic repo locally. This works out great if you want to cherry pick something out of any of the previous backup points. Unlike my previous incremental-only file backups, each backup point contains a complete copy of the files at that time. You can feel safe knowing that this restores will be what you expect.


