
It almost goes without saying that the best advice when running a WordPress site is to have regular backups, run WordPress updates regularly, use good passwords and use a reputable web host. Do that and you’ll rarely need to deal with cleaning up an infected WordPress site.
The following is an outline of how I handle cleaning up WordPress sites for my customers here at Anchor Hosting. If you just need someone to help you out, then consider switching web hosting over to Anchor Hosting as my cleanup process comes included for all customers with an active hosting plan – or reach out to a WordPress developer and point them to this guide. Otherwise read on if your interested to learn how to do this yourself.
Full site restores are great, however not always an option.
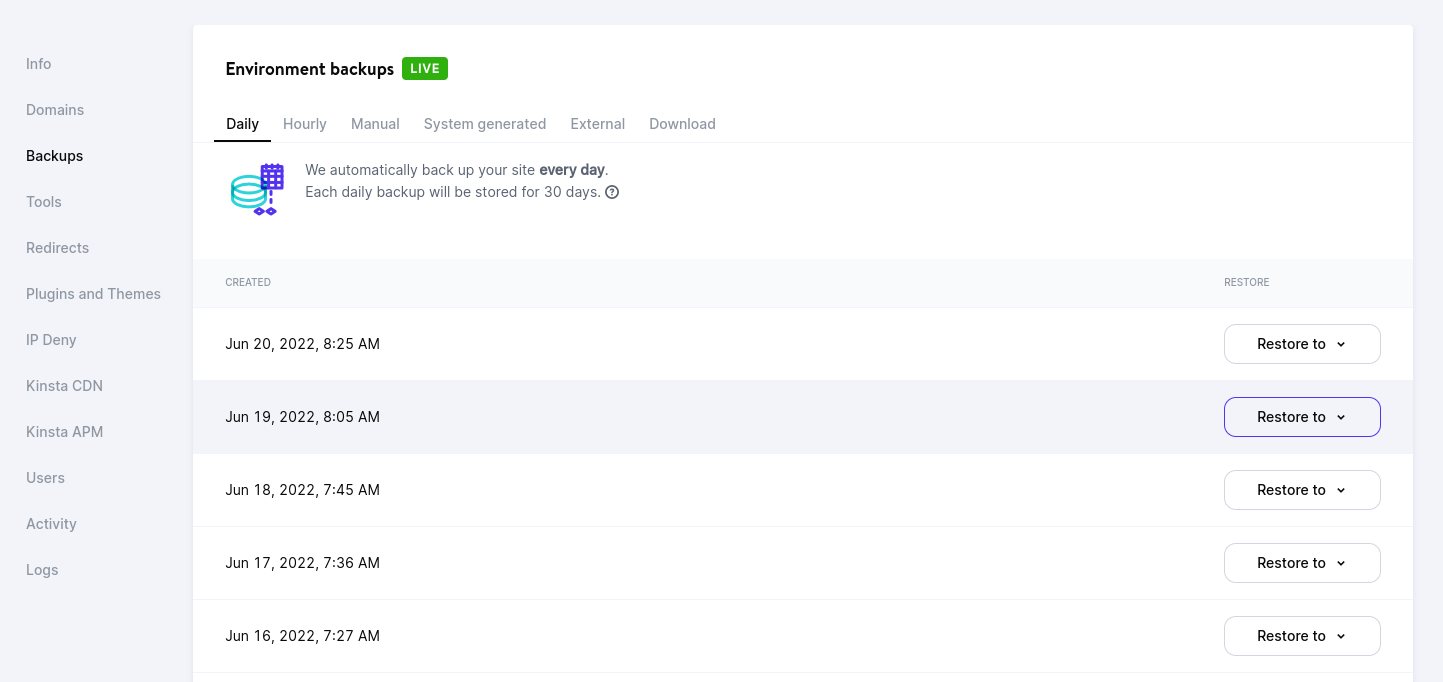
When a website is infected a mess of things can happen. I’ve seen anything from full site crashes, to spam links being very subtly added throughout the website, to WordPress user accounts being added to file changes (core/themes/plugins). Restoring the entire site from a clean backup would be ideal, however it can be problematic for certain situations. For instance, like running a highly dynamic and content-driven site like a WooCommerce store. Or maybe the issue wasn’t very obvious and the last clean backup is weeks or months old. If a full site restore is too painful then let’s clean the website up manually.
SSH and WP-CLI are your friends.
First step of cleaning up a WordPress site is to asset the damages. Connect over SSH and attempt to run these commands.
wp core verify-checksums
wp plugin verify-checksums --all
wp user list
If you see any errors or unknown WordPress users then it’s highly recommend to reinstall core, themes, plugins and generate new WordPress authentication salts.
wp core download --force
wp theme install --force $( wp theme list --field=name )
wp plugin install --force $( wp plugin list --field=name )
wp config shuffle-salts
Reinstalling WordPress won’t touch the wp-config.php, so that file will need to be reviewed and cleaned up manually. Refer to wp-config-sample.php for an example of what a clean file should look like. The above WP-CLI install commands will attempt to reinstall all installed themes and plugins. This will only be able to handle free themes and plugins from wordpress.org.
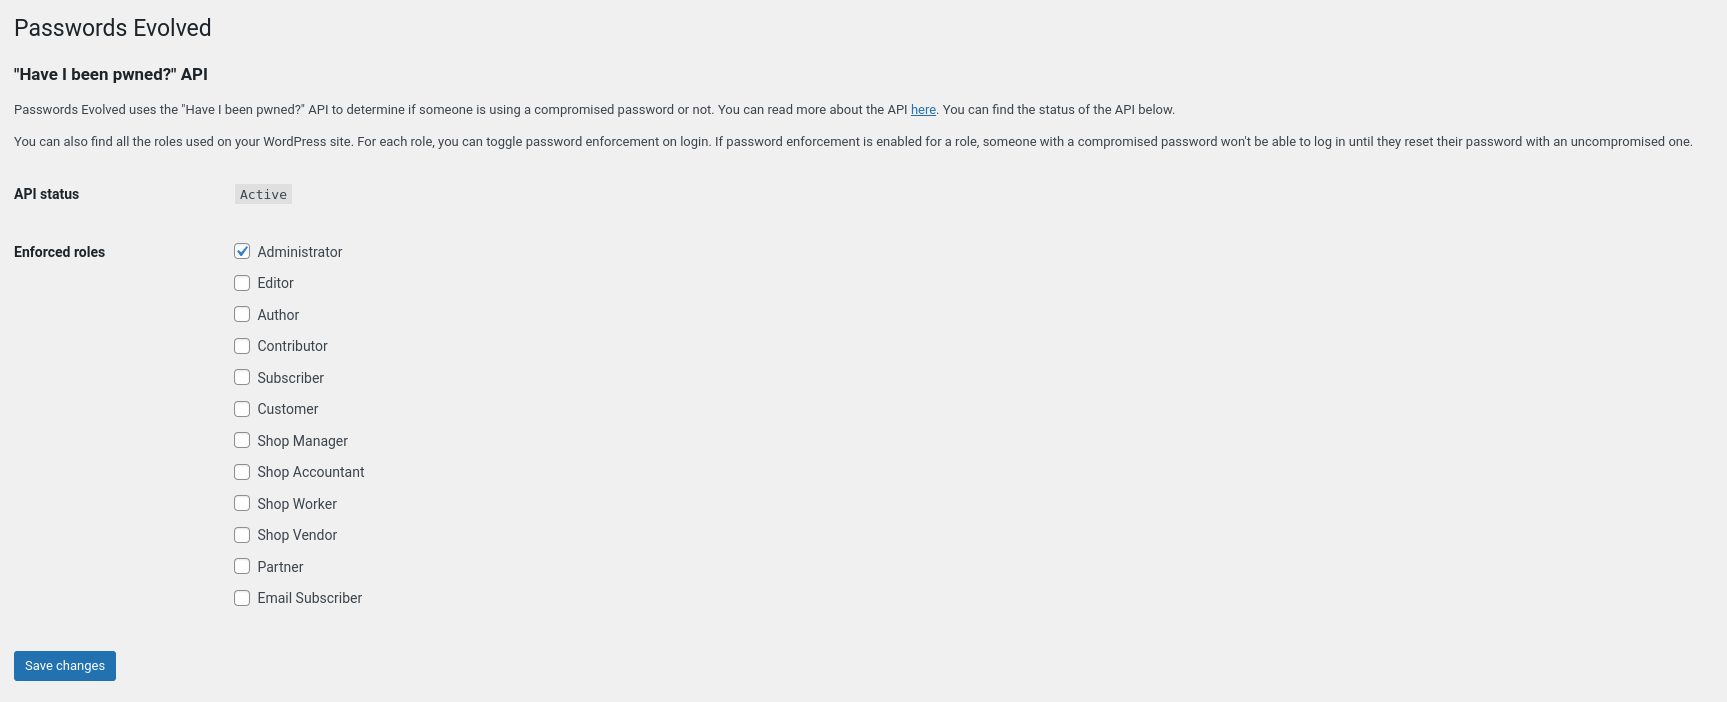
The next step is to reinstall any paid plugins or themes. If you don’t have access to all of those then I recommend downloading the last clean backup and restoring plugins/, themes/ and mu-plugins/ directories. Remove any WordPress users that you do not recognize and install Passwords Evolved.
wp plugin install passwords-evolved --activatePasswords Evolved will prevent WordPress administrators from using comprised passwords. It works by checking WordPress’ hashed passwords against the Have I been pwned? API. If a match is found then a password reset will be required before signing in.
Selectively restore data from database backup
One of most difficult parts is cleaning up malicious content injected to pages and posts. If only a few areas are affected then WordPress’ built in revisions can help revert to a previous version. This is also a great way to review the damages.
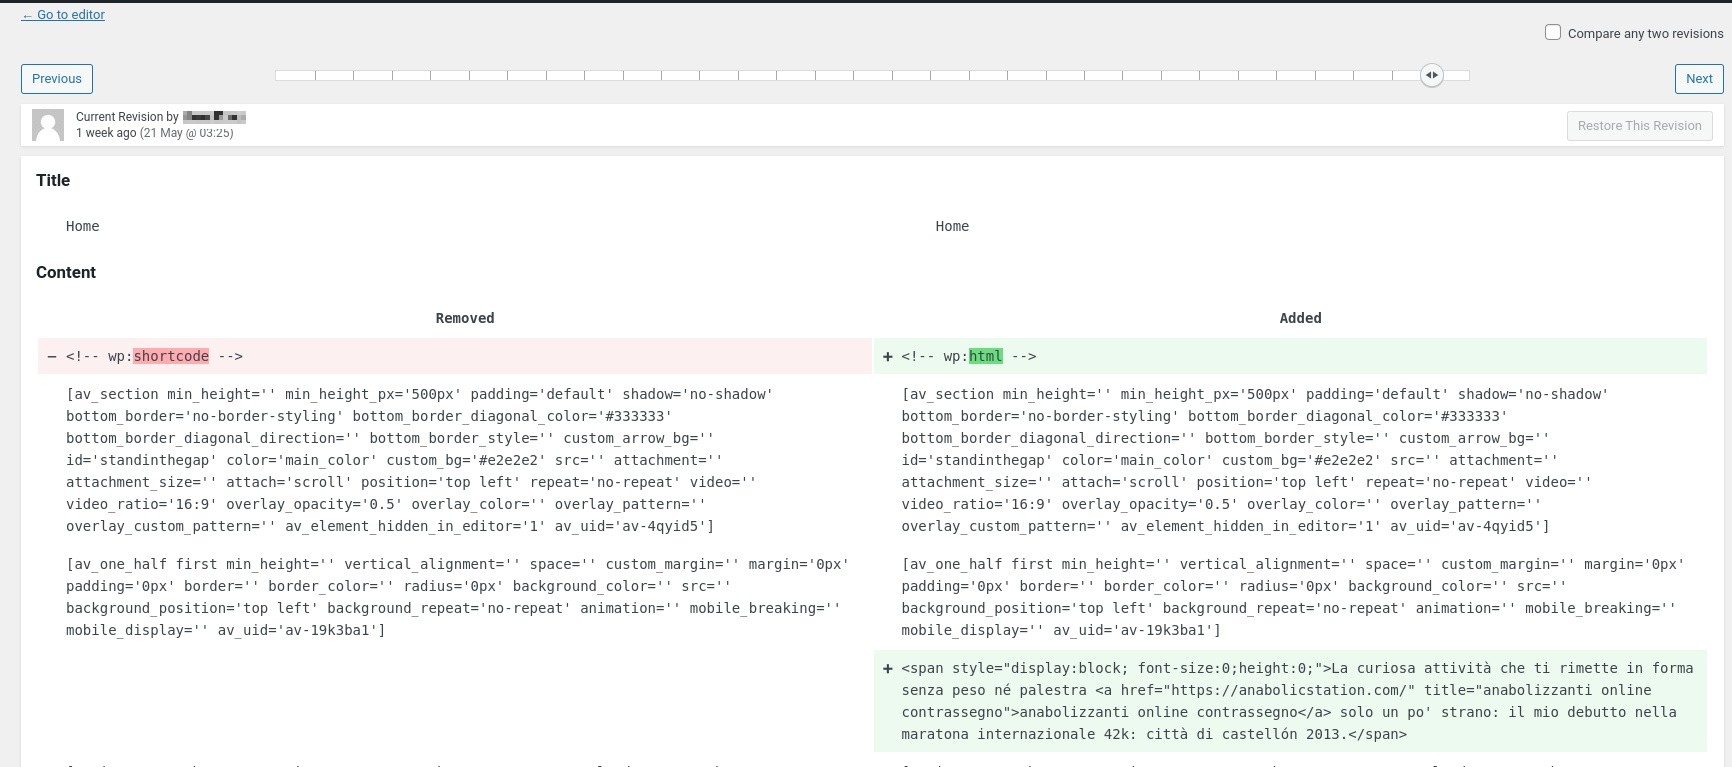
However, if unique malicious content was added to every page or post, then restoring each page manually might not be realistic. Here is rough outline of steps I’ve taken to recover page and post content from a previous database backup while keeping most of the database content untouched.
- Download a database backup from before the infection.
- Import that database to a staging site or other temporary location where you can run SQL queries. Also a plus if this temporary location has phpMyAdmin.
- Run SQL queries to target affected content. For example you can target posts modified on certain day like this.
SELECT * FROM wp_posts WHERE post_type = 'post' and post_modified between '2022-05-23' and '2022-05-24'; - Export those posts with
UPDATESQL script. In phpMyAdmin you’ll need to:- Turn off “Add
CREATE TABLEstatement” - Change “Function to use when dumping data” from INSERT to UPDATE.
- Turn off “Add
- Import prepared SQL export over to live site.
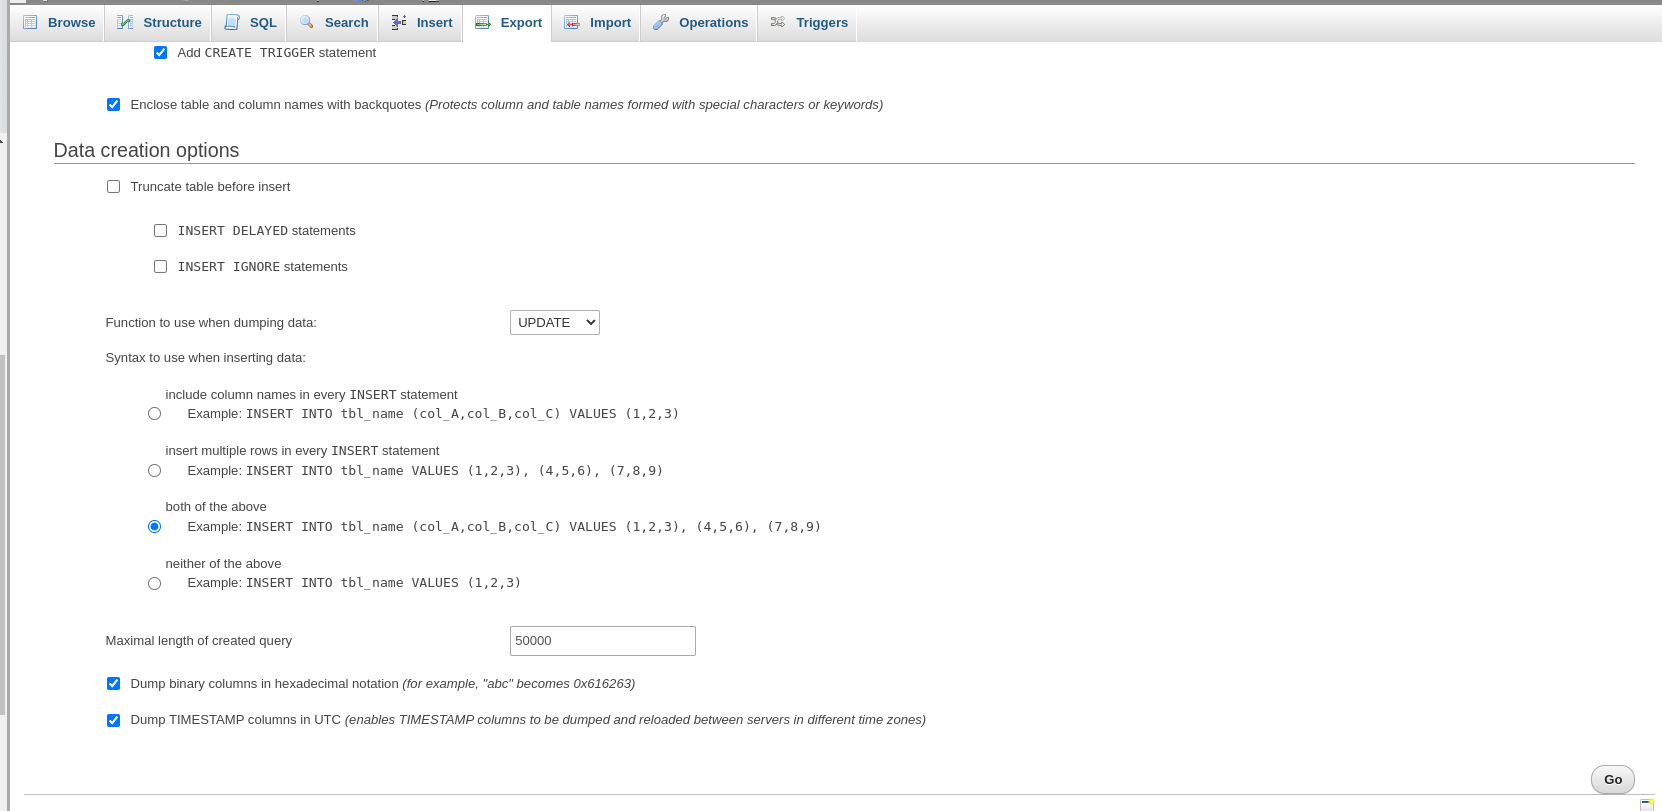
UPDATE function to import data for easy overwrite existing site.If done correctly, the SQL export will only update your selection of content in the wp_posts table while keeping everything else the same. This same process might need to be repeated for other forms of data. Query data manually will require a good understanding of where WordPress stores data. If done improperly, you can mess of your live site so proceed with caution. So always do a database backup before importing database from a backup.
wp db exportVerifying the website is now clean.
Free online scanners like Sucuri Site Check and VirusTotal can identify major issues, however they are not great at figuring out if all malicious remnants have been removed. I tend to use those tools only after I’m confident all malicious activity has been removed as a way to hunt for security firms which may have blacklisted the website. If any blacklists are found, each firm should have a process to re-validate your website and remove from the blacklist.
Before investing in a paid scanner, I recommend checking with your web host to see if they can run a scan for anything malicious. I know the folks at Kinsta do a fantastic job and running their own scans, however I always do my best to make sure everything is clean before I reach out to them for a scan. If you need to take things further I’d recommend consulting with a WordPress developer for the remainder of the cleanup. I’ve had too many situations where a customer purchased a security cleanup tool only to reach out to me for assistance.